Building a 3D-Printed Telescope
Around 2020, I acquired an old Optical Craftsman telescope on a cast iron equatorial mount. It was my first real telescope, and it was a great way to learn the basics of observing, alignment, eyepieces, mounts, and the general mechanics of a reflecting telescope.
It worked well, but it was also large, heavy, and not very practical once I moved into apartments. The cast iron mount was solid, but it was not something I wanted to haul around every time I wanted to observe.
In early 2025, I decided to reuse the mirror and secondary from that telescope and build a new, more portable scope around them.
Starting the Design
This project also became my reason to buy my first 3D printer.
At the start, I had no CAD experience. I began with Tinkercad, which was useful for getting comfortable with the basic idea of modeling parts, but I quickly ran into its limits. The telescope needed more precise and reusable designs than Tinkercad was really suited for.
After that, I moved to Onshape and designed the real scope there.
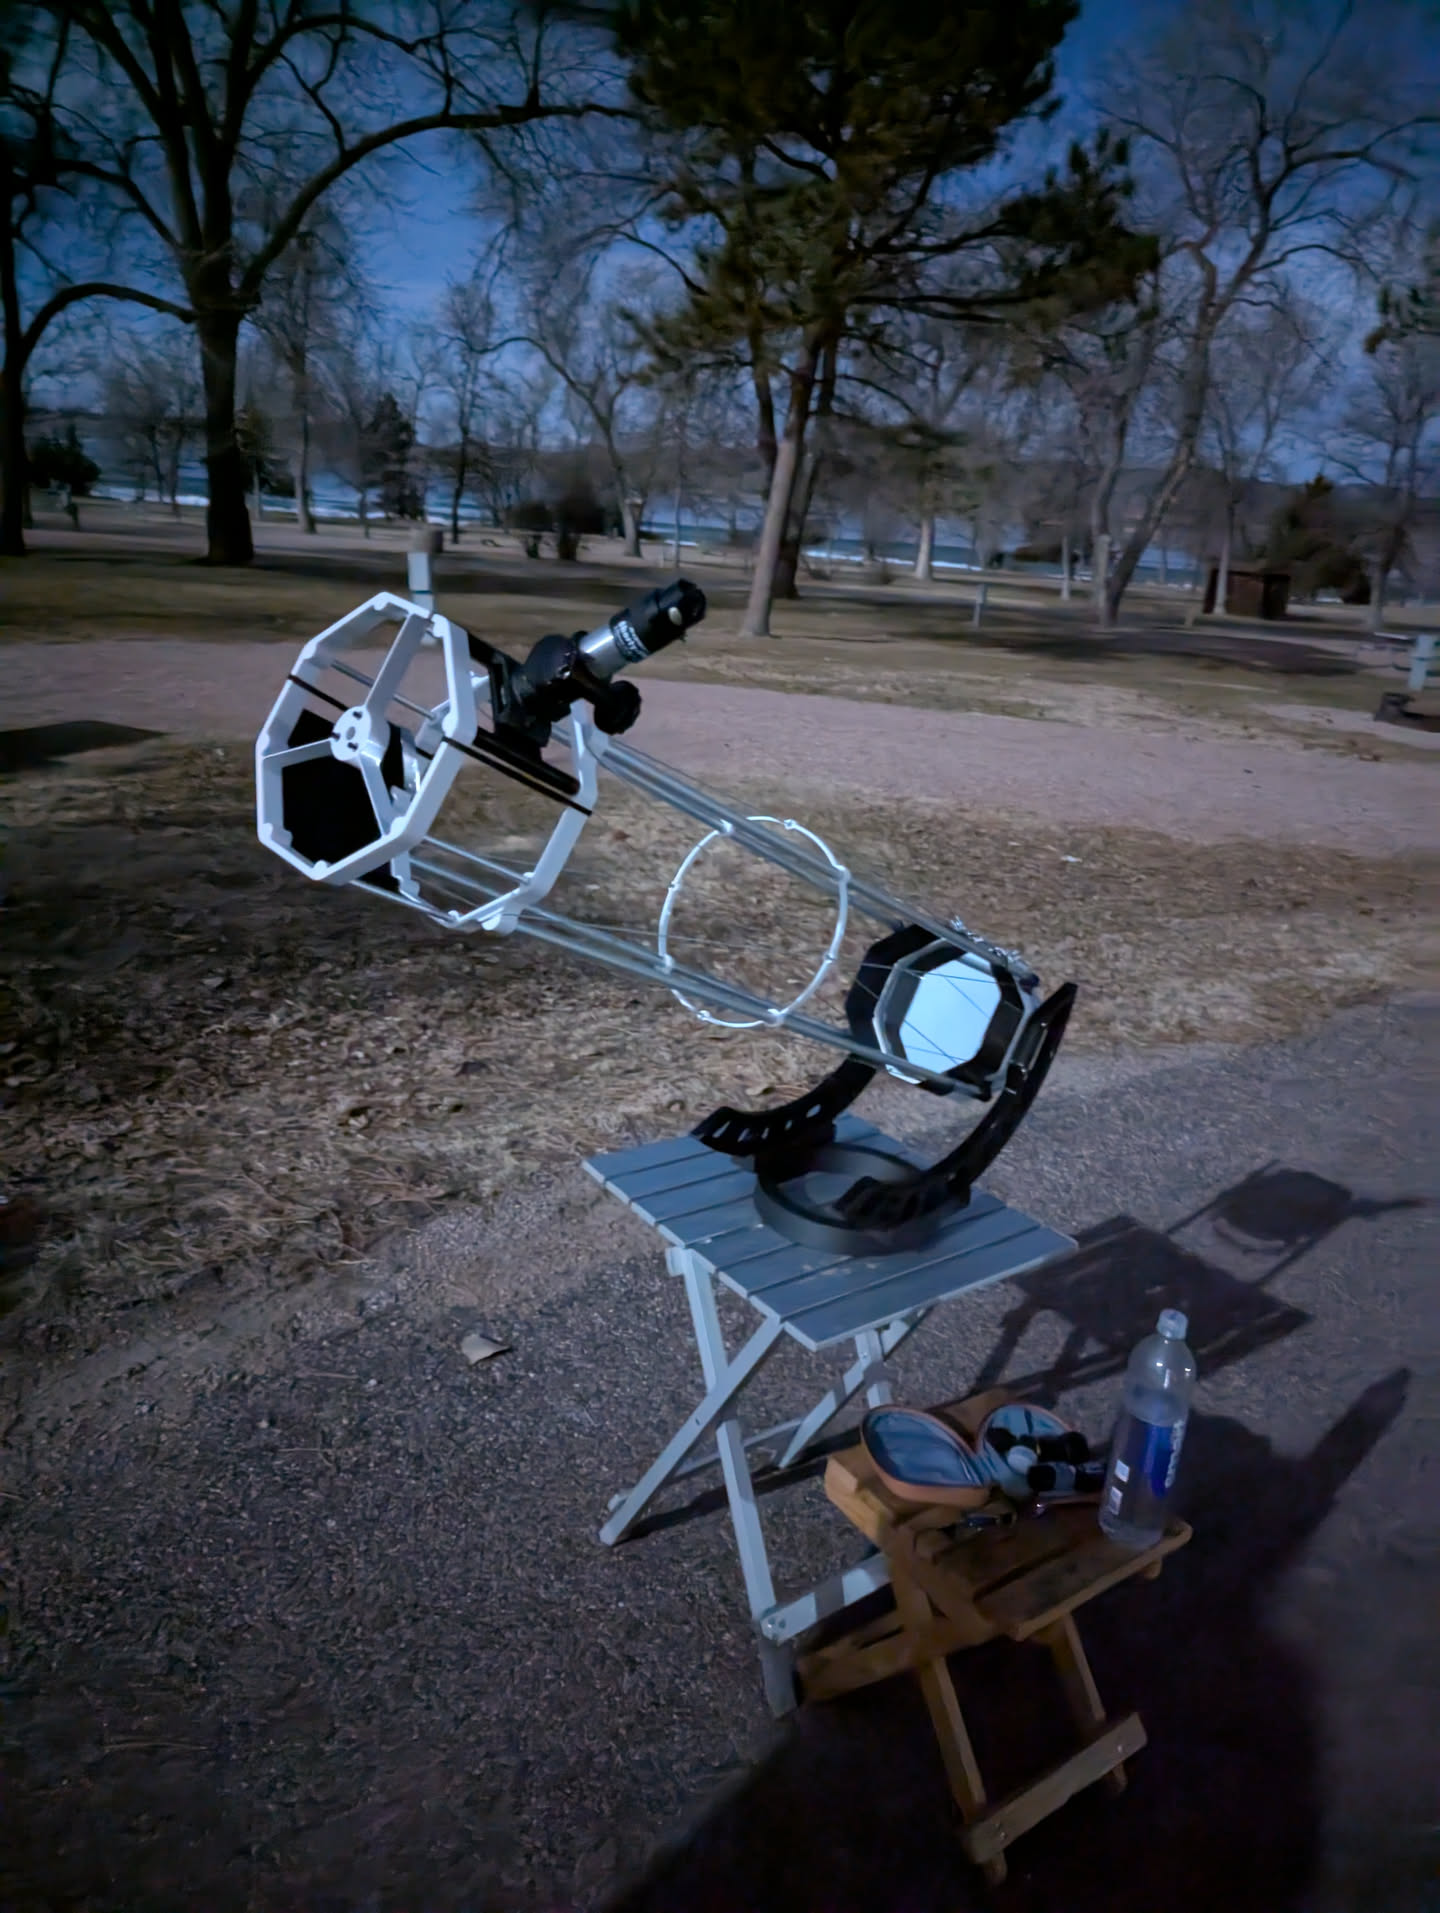
Over the course of February 2025, I designed, printed, tested, adjusted, and assembled the telescope. The goal was to create a lightweight truss-style Dobsonian using 3D-printed structural components wherever practical.
Materials and Structure
The telescope reused the primary mirror, secondary mirror, and focusser from the old Optical Craftsman scope.
The new structure used 3D-printed parts for the mirror box, upper assembly, rail mounts, and other structural pieces. For the trusses, I used half-inch, four-foot-long aluminum pipe. For tensioning and support, I used thin braided steel cable.
The large circular side rails were printed in sections and assembled after printing. Since the parts were too large to print as single pieces, the design had to account for how the sections would connect and stay aligned.
The result was a much lighter and more portable telescope than the original equatorial-mounted scope.
First Field Test
In March 2025, I took the telescope out for a real observing trip during the lunar eclipse on March 14th. The eclipse peaked around 1am.
During that trip, I successfully observed the Moon, M81, and M82. I was mostly using an old Circle T 25mm Japanese volcano-top eyepiece, which worked pretty well with the scope.
That trip proved the telescope worked, but it also showed me where the design needed improvement.
Post-Trip Upgrades
After the first field test, I made a few upgrades.
The circular rail mounts needed reinforcement, so I added a truss to each one. Before that, they acted too much like springs and made the telescope bouncy.
I also added a shroud. Stray light was a major issue with the open truss design, and the background field looked much lighter than it should have. It's a miracle I was able to observe galaxies with it.
Finally, I added tick marks for altitude and azimuth as an early manual pointing system. The idea was useful, but I flipped the altitude values, so that version did not work as intended.
Final Result
The finished telescope was lightweight, portable, and usable in the field. It started as an old, heavy telescope that was difficult to use after moving into an apartment, and it became a compact 3D-printed truss Dobsonian that I could actually take outside and observe with.
The project taught me a lot about CAD, 3D printing, telescope mechanics, stiffness, balance, and the difference between something that looks good in a model and something that works under the night sky.